Order Data
The Order page is the central place to create new imagery requests in the dashboard.
At the top of the map, you can choose between Composite or Tiles / Minitiles ordering.
Composite Orders
- Composite mode is selected by default.
- Define your Area of Interest (AOI) in one of two ways:
- Draw on the map using Leaflet tools.
- Upload WKT / GeoJSON by pressing the import button in the bottom-left corner of the map.
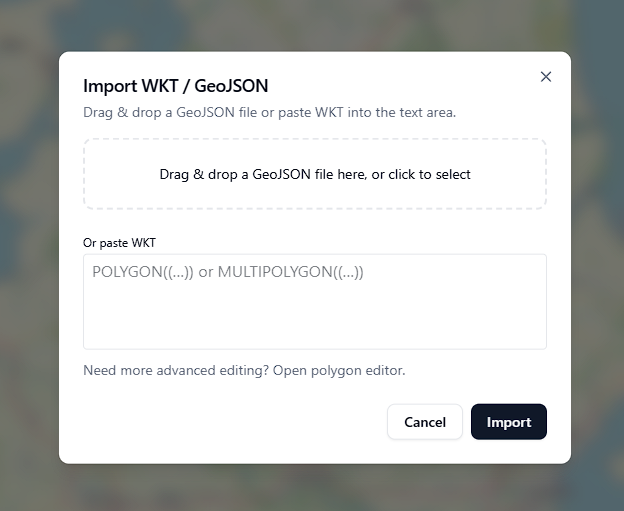
AOIs can be provided as polygons or multipolygons. Once added, the AOI will appear on the map and in your order setup.
Tile & Minitile Orders
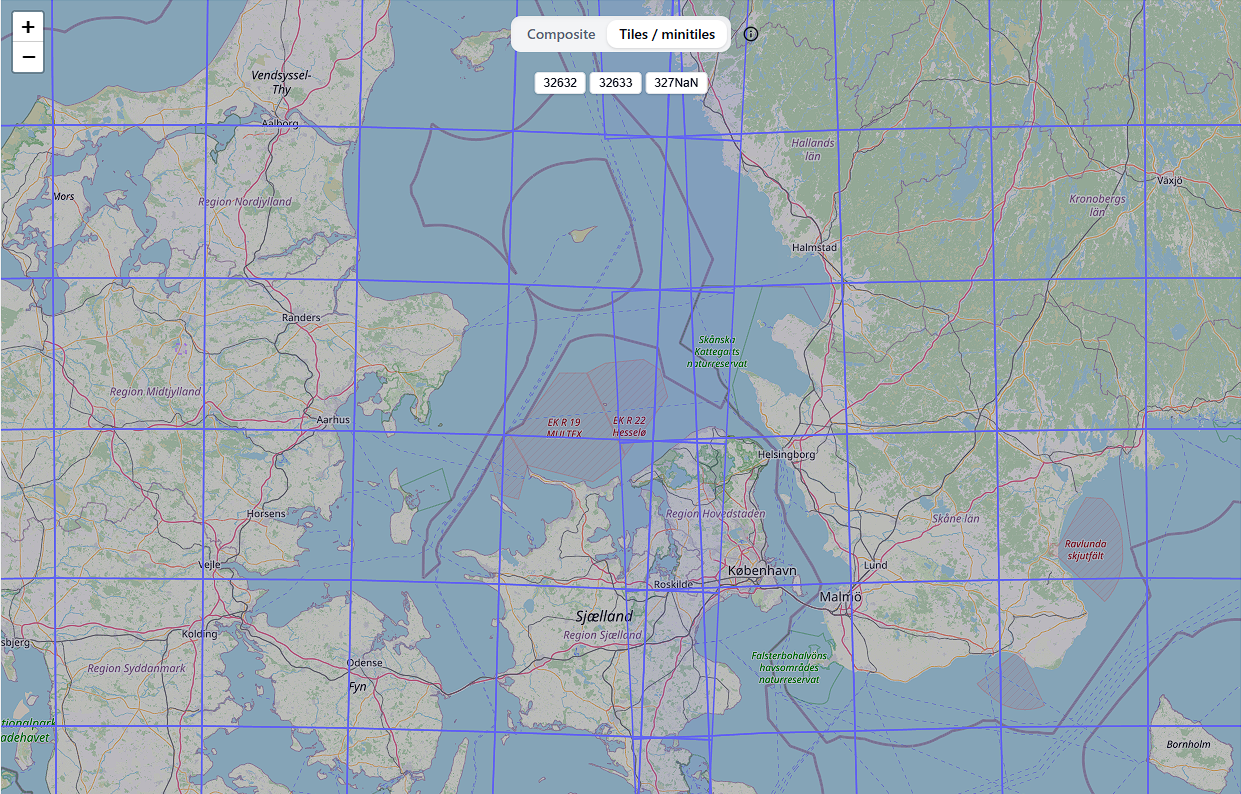
Switch to Tiles / Minitiles mode to use predefined geographic grids. Tiles load automatically once you zoom in far enough.
- Click on a tile → Selects that tile as part of the order.
- Right-click on a tile → Splits it into minitiles for finer-grained selection.
- You can freely combine tiles and minitiles in the same order.
If you first select a full tile and then right-click to split into minitiles, all minitiles start out as selected.
If you split a tile without selecting it first, all minitiles will start as unselected.
UTM Zone Toggles
In tile mode, overlapping tiles can appear in UTM transition zones. Buttons above the map allow you to disable or enable specific UTM zones, making it easier to select only the tiles relevant to your AOI.
Map Settings – Existing Orders Overlay
Next to the Upload WKT button, you’ll find Map Settings.
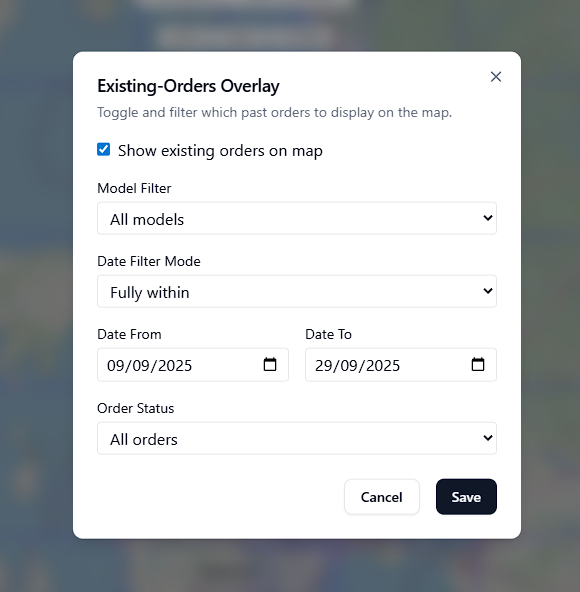
This allows you to overlay existing orders on the map while planning a new one.
- Show existing orders → Toggle overlay on/off (default: off).
- Model filter → Restrict by model (e.g., Stratus2 only).
- Date filter → Choose “Fully within” or “Any overlap” and set custom date ranges.
- Order status filter → Show only live or completed orders.
This feature is useful if you want to avoid overlap with past orders or ensure consistency with existing datasets.
Configure Settings
Once your AOI (composite, tiles, or minitiles) has been added, click Configure… at the bottom of the page. This opens the Order Settings panel:
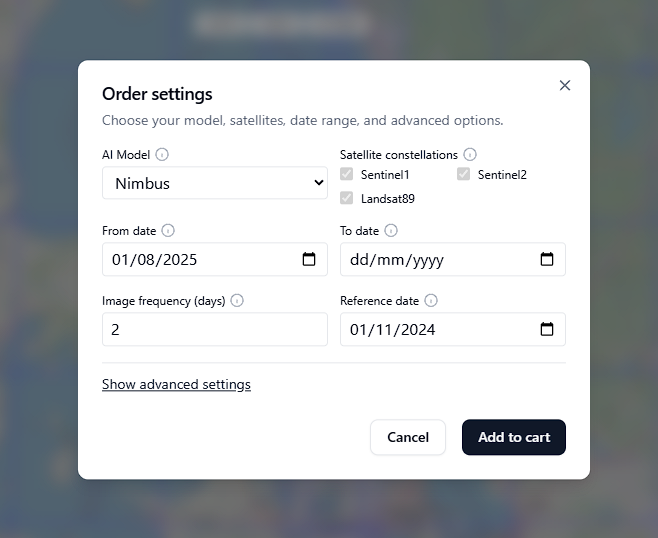
Basic Settings
- AI Model → Select which cloud-removal/fusion model to use (e.g., Stratus2).
- Satellite Constellations → Choose input sources (e.g., Sentinel-1, Sentinel-2, Landsat).
- From Date → Start date for imagery.
- To Date → End date (leave blank for recurring live orders).
- Image Frequency → Delivery frequency in days (e.g., 2 = every 2 days).
- Reference Date → Align multiple orders to the same schedule.
Advanced Settings
Expand Show advanced settings for more options:

- Storage Months → How long imagery should remain available (first month free).
- API Requests → Number of API retrievals included with this order.
- Tile Deduplication (tile orders only) → Avoids billing for duplicate data.
- If enabled, ClearSKY scans past tile orders with the same model, satellites, and date range.
- Already-produced data (even if deleted) is not re-generated or billed again.
Add to Cart
Click Add to Cart to add the configured order to your cart.
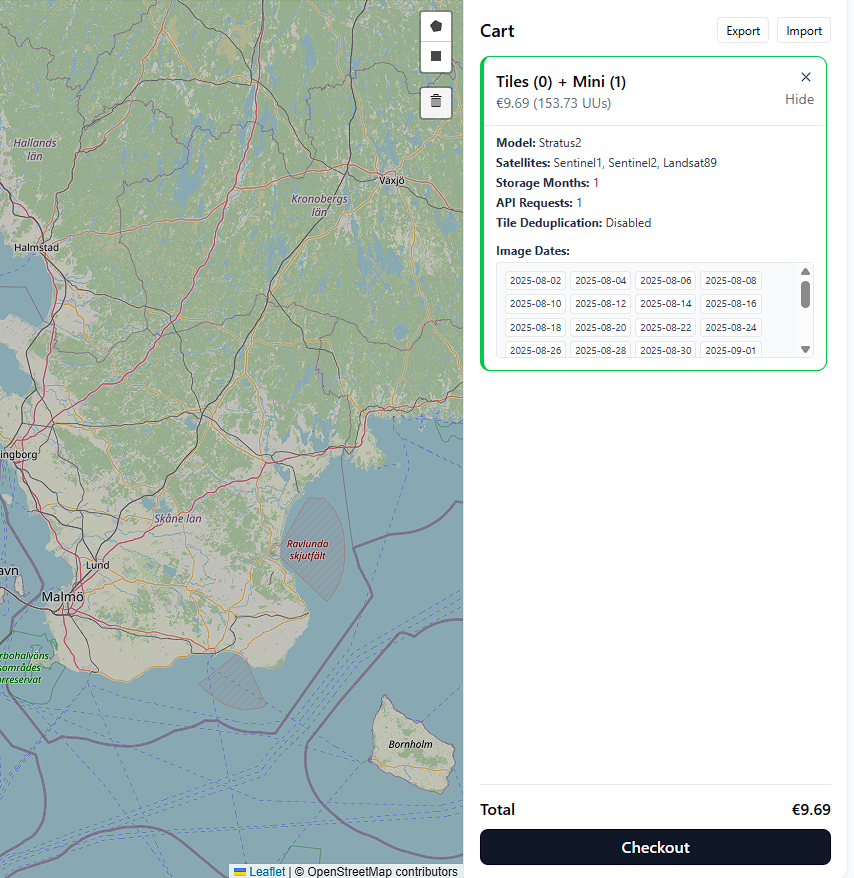
Each item displays:
- Order type (composite, tile, or minitile).
- Model and satellites.
- Storage months.
- API request quota.
- Deduplication status (tiles only).
- Image dates covered.
- Estimated cost in EUR.
Checkout
When ready, click Checkout at the bottom of the cart.
- Review your selections and estimated total cost.
- Confirm the order.
- Orders move into the review stage and then begin processing.
Cancellation Rules
- Orders in review stage can be cancelled completely.
- Recurring orders can be cancelled at any time → the current month will still complete, but the next month will not renew.
Orders are billed in EUR order credits, not processing credits.
The estimated cost in € is always shown in the cart before checkout.
The Order page supports both precise AOIs (composites) and cost-effective bulk requests (tiles/minitiles).
It’s the most flexible way to request new imagery within the dashboard.